Setting Up a Weather Station (Specifically, My Weather Station)
|
This post is outdated. Some of the hardware-oriented parts may still be of use to someone. The software, however, is deprecated -- the BMP180 sensor driver from Adafruit is no longer maintained, Python2 is end-of-life, and the WeeWX service definition doesn't work anymore. For an updated solution, using a BMP280 sensor, Python3, and my own service definition, see Setting Up a Weather Station AGAIN: The BMP280 Era. |
Table of Contents
This project assumes that you have familiarity with the Linux command line, basic knowledge of Git, an extremely basic knowledge of electrical circuits and soldering, and an obsessive interest in your local weather. The hardware and software that I used represent just one of countless possible configurations, but I thought my experience as a beginner with some of these technologies and my solutions to problems that I encountered might be useful to others. I began with three goals that had different priorities at different times:
-
To finally set up my own complete weather station
-
To learn about software defined radio (SDR)
-
To do something useful with the Raspberry Pi platform
I accomplished all of these things and also learned that my immediate vicinity is home to a Citroën automobile that has radio-enabled tire-pressure sensors, that one of my neighbors has a fancy and talkative smart refrigerator, and that the construction site across the street has equipment announcing its oil pressure to the world. I had to modify the SDR software driver for my weather station's instrument cluster when it turned out to be unsupported by the WeeWX weather system, the weather-data server that I used. And I discovered that information about amateur meteorology and Raspberry Pi hacking and SDR is something of a maze, which motivated me to record the path I found through it.
Some notes before starting.
Here are some conventions and observations that will be useful when working through this guide.
-
In program listings, three dots (…) means more stuff that I removed to save space. Don't copy these into a command.
-
File placement of WeeWX components follows one of two models: Everything goes under the user's home directory or Everything goes in traditional Unix file system locations. The WeeWX Git package follows the first convention, the Debian package follows the latter. Since I am using Debian (actually, Raspbian), I conform to Debian in all cases. This differs from the source tutorials I drew from, which are all over the place.
-
The WeeWX init commands frequently won't start without several tries. I always have a log window open and WeeWX debugging turned on (instructions to come) as I bang repeatedly on the init script options start, stop, restart, and reload to see what works. Here is an example a tail command and some log output typical of what the WeeWX daemon puts out when it is running:
pi@poley:~ $sudo tail -f /var/log/syslogMay 20 14:27:12 poley weewx[29609]: engine: Starting main packet loop. May 20 14:27:15 poley weewx[29609]: sdr: MainThread: lines=[] May 20 14:27:18 poley weewx[29609]: sdr: MainThread: lines=[] May 20 14:27:21 poley weewx[29609]: sdr: MainThread: lines=[] ...
My weather station kit, the Ambient Weather WS-2902A, was purchased from Amazon. Marketed by Ambient Weather of Chandler, Arizona, USA, the kit includes an outdoor "Osprey" sensor array and a non-touch tablet console. The console measures indoor temperature, humidity, and barometric pressure. The console receives weather data by radio from the outdoor sensor, and can also connect over Wi-Fi to the Internet, allowing data to be relayed to amateur weather websites such as Weather Underground.
(Photo from the Ambient website, complete with the bad AI-generated hand.)
The sensor array is a WH65B, manufactured by Fine Offset Electronics in Shenzen, China. The same label is slapped on multiple products that have slightly different firmware. Mine broadcasts the name Fineoffset-WH65B, differing from others in spelling and punctuation. Power is from two AA batteries (3V). The array broadcasts data at 915 MHz with a nominal range of 300 feet. This signal is meant for the console, but in this project, I also intercept it using an SDR dongle connected to a Raspberry Pi 3B+. Broadcast data includes the following weather information:
-
Temperature
-
Humidity
-
Precipitation
-
Wind speed
-
Wind direction
-
Light intensity
-
UV intensity
Conspicuously absent from this list is barometric pressure, which, as noted above, is detected by a sensor housed in the tablet. The difficulty of capturing pressure along with the other readings led to Part 2 of this project.
Since I was new to the world of Raspberry Pi hacking, I bought a complete Raspberry Pi 3B+ kit from Canakit. This came with a breadboard, a GPIO-to-interface IO board, miscellaneous jumper wires, an old-style IDE ribbon cable, a plastic case for the Pi, and a package of switches and LEDs good for experimenting with Blinkenlichten.
I selected Raspbian as the operating system for the Pi because I am a Debian GNU-Linux user and because it was pre-installed as an option on the SD-card from Canakit. I won't go into detailed instructions for setting up a Pi+Raspbian, since that information is readily available on the Web. The quickstart instructions included in the kit were all I needed to arrive at a familiar Debian-like environment. After network setup (including SSH configuration), user configuration, updating, and so on, use apt to install python2, python-dev, python-smbus, git, build-essential, cmake, libusb-1.0-0-dev, sqlite3, apache2, and any dependencies those pull in.
I bought a NooElec NESDR Smart v4 radio dongle as part of a kit that included three different types of antenna. The device plugs into one of the Pi's USB ports.[1]
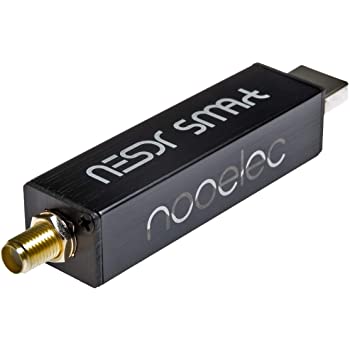
Specifications
-
Demodulator: RTL2832U
-
Tuner: R820T2
-
Frequency range: 25 MHz–1700 MHz
The 4.5" UHF antenna (included in the kit) worked well at the desired 915 MHz frequency.
RTL-SDR is a package of libraries and utilities to control a RTL2832U-based DVB-T/DAB+/FM USB dongle. This software is required as a bridge between the digitized output of the RTL2832U chip and a decoding utility, rtl_433, that can extract data understood by WeeWX. According to the project site,
The rtl-sdr codebase contains a basic FM receiver program that operates from the command line. The rtl_fm program is a command line tool that can initialize the RTL2832, tune to a given frequency, and output the received audio to a file or pipe the output to command line audio players such as the alsa aplay or the sox play commands. There is also the rtl_sdr program that will output the raw I-Q data to a file for more basic analysis.[2]
-
RTL-SDR is available in the Raspbian Buster repositories as rtl-sdr. Install it using apt:
pi@poley:~ $sudo apt-get install rtl-sdrI see on my system that version 0.6-1+rpt1 was installed.[3]
-
Follow these tutorial instructions to blacklist the OS-default dvb_usb_rtl28xxu kernel module. This was necessary to make the dongle work.
-
Reboot the Pi.
RTL_433 is a powerful SDR utility that can decode all kinds of transmissions from devices broadcasting in the ISM band, which is reserved for "industrial, scientific and medical (ISM) purposes other than telecommunications."[4](That's how I picked up the smart refrigerator and the rest.) The name comes from the standard ISM frequency 433.92 MHz, but it can tune to any frequency supported by the hardware, including 915 MHz, the frequency that my outdoor sensor cluster transmits on.[5]
WeeWX calls RTL_433 to obtain SDR sensor data. It's not in the Raspbian repositories, so we clone it using Git.
Procedure 1.1. To install RTL_433
-
Clone the package from Github.
pi@poley:~/git $git clone https://github.com/merbanan/rtl_433.git -
In the rtl_433 directory, build the program files by running the following command string:
Note: When I rebuilt all this after a hardware failure, I had to manually install cmake, libssl-dev, libusb-dev, and librtlsdr*, along with the dependencies they pulled in (28 June 2021).pi@poley:~/git/rtl_433 $mkdir build && cd build && cmake ../ && make-- The C compiler identification is GNU 8.3.0 -- Check for working C compiler: /usr/bin/cc -- Check for working C compiler: /usr/bin/cc -- works -- Detecting C compiler ABI info ... Install using the following command, running it from the build directory, where you should be now:
pi@poley:~/git/rtl_433/build $sudo make installTest it.
-
Run the default mode and see if you pick up any refrigerators:
pi@poley:~ $rtl_433 rtl_433 version 20.02-56-gd4ce64b branch master at 202005201829 inputs file rtl_tcp RTL-SDRUse -h for usage help and see https://triq.org/ for documentation. Trying conf file at "rtl_433.conf"... Trying conf file at "/home/pi/.config/rtl_433/rtl_433.conf"... Trying conf file at "/usr/local/etc/rtl_433/rtl_433.conf"... Trying conf file at "/etc/rtl_433/rtl_433.conf"... Registered 124 out of 152 device decoding protocols [ 1-4 8 11-12 15-17 19-21 23 25-26 29-36 38-60 63 67-71 73-100 102-105 108-116 119 121 124-128 130-149 151-152 ] Found Rafael Micro R820T tuner Exact sample rate is: 250000.000414 Hz [R82XX] PLL not locked! Sample rate set to 250000 S/s. Tuner gain set to Auto. Tuned to 433.920MHz. Allocating 15 zero-copy buffers -
Check if the outdoor weather sensor is broadcasting. This is the same command string that WeeWX will use.
pi@poley:~ $rtl_433 -M utc -F json -R 78 -f 914980000 -s 250000rtl_433 version 20.02-56-gd4ce64b branch master at 202005201829 inputs file rtl_tcp RTL-SDR Use -h for usage help and see https://triq.org/ for documentation. Trying conf file at "rtl_433.conf"... Trying conf file at "/home/pi/.config/rtl_433/rtl_433.conf"... Trying conf file at "/usr/local/etc/rtl_433/rtl_433.conf"... Trying conf file at "/etc/rtl_433/rtl_433.conf"... New defaults active, use "-Y classic -s 250k" for the old defaults! Registered 1 out of 152 device decoding protocols [ 78 ] Found Rafael Micro R820T tuner Exact sample rate is: 250000.000414 Hz [R82XX] PLL not locked! Sample rate set to 250000 S/s. Tuner gain set to Auto. Tuned to 914.980MHz. Allocating 15 zero-copy buffers {"time" : "2020-05-21 07:09:34", "model" : "Fineoffset-WH65B", "id" : 16, "battery_ok" : 1, "temperature_C" : 11.700, "humidity" : 69, "wind_dir_deg" : 324, "wind_avg_m_s" : 0.127, "wind_max_m_s" : 0.510, "rain_mm" : 110.490, "uv" : 2, "uvi" : 0, "light_lux" : 0.000, "mic" : "CRC"} {"time" : "2020-05-21 07:09:50", "model" : "Fineoffset-WH65B", "id" : 16, "battery_ok" : 1, "temperature_C" : 11.700, "humidity" : 70, "wind_dir_deg" : 297, "wind_avg_m_s" : 0.637, "wind_max_m_s" : 1.020, "rain_mm" : 110.490, "uv" : 2, "uvi" : 0, "light_lux" : 0.000, "mic" : "CRC"}...
-
I installed WeeWX using the project site's instructions for Raspbian, WeeWX: Installation on Debian-based systems. I'll reproduce the steps here for completeness and so I can comment.
Procedure 1.2. To install WeeWX on the Pi
Add the WeeWX signing key to apt:
pi@poley:~ $wget -qO - http://weewx.com/keys.html | sudo apt-key add -Next add a repository. I am using Python2 throughout this project, so I chose the WeeWX repository suited for that. It's intended for Raspbian Squeeze, not Raspian Buster, but, whatever. It works.
pi@poley:~ $wget -qO - http://weewx.com/apt/weewx-python2.list | sudo tee /etc/apt/sources.list.d/weewx.listUpdate and install. As the WeeWX site says, "The installer will prompt for a location, latitude/longitude, altitude, station type, and parameters specific to your station hardware." However, WeeWX core only supports wired serial or USB connections to station hardware. For WeeWX to receive weather data over SDR, a software adapter is needed, and some customization to the WeeWX configuration file. (See Installing the WeeWX SDR Adapter.) Consequently, when the installer asks for "weather station type", select Simulator for now.
pi@poley:~ $sudo apt-get updatepi@poley:~ $sudo apt-get install weewx-
When installation is complete, the first thing to do is to turn on debugging so that you can see what the WeeWX daemon is doing. Edit
/etc/weewx/weewx.confand edit the debug directive in the first section to look like this:# WEEWX CONFIGURATION FILE # # Copyright (c) 2009-2019 Tom Keffer <tkeffer@gmail.com> # See the file LICENSE.txt for your rights. ############################################################################## # This section is for general configuration information. # Set to 1 for extra debug info, otherwise comment it out or set to zero # debug = 0 debug = 1 # Root directory of the weewx data file hierarchy for this station WEEWX_ROOT = / ...
-
Next, we need to edit the WeeWX init script so that it can find rtl_433 later on. Open
/etc/init.d/weewxin a text editor and change the PATH definition to look like this:# PATH should only include /usr/* if it runs after the mountnfs.sh script # PATH=/sbin:/usr/sbin:/bin:/usr/bin PATH=/sbin:/usr/sbin:/bin:/usr/bin:/usr/local/bin
I figured this out the hard way but you don't have to.
-
Now restart WeeWX:
pi@poley:~ $sudo /etc/init.d/weewx restartAnd watch the syslog for output like this:
pi@poley:~ $sudo tail -f /var/log/syslog... May 21 21:34:44 poley weewx[6034]: engine: Finished loading service weewx.engine.StdReport May 21 21:34:44 poley weewx[6034]: engine: Starting up weewx version 3.9.2 May 21 21:34:44 poley weewx[6034]: engine: Clock error is -0.10 seconds (positive is fast) May 21 21:34:44 poley weewx[6034]: engine: Starting main packet loop. ...It should be working, but not doing much, because it's not receiving any weather data yet.
The WeeWX SDR Adapter parses data received from rtl_433, determining the weather station device type and packaging the weather data in a format that WeeWX can process.
This subtask took me as much time as everything else put together because it involved writing a new parser for my outdoor instrument cluster. This was a surprise, because the WeeWX SDR Adapter already contains a class to parse a WH65B cluster, and I knew this before I bought the weather station kit. As it turns out, there is more than one flavor of WH65B, and each flavor has its own distinct firmware bearing its own unique device ID string.
Looking at the adapter code, I saw that the ID string is used to identify the
device and assign the appropriate mapping between device data fields and WeeWX data
fields. I first tried hacking the device ID in the code to match my WH65B's string
("Fineoffset-WH65B"). This partly worked, and WeeWX began receiving data, but many
of the data fields were wrong or empty. I realized that it wasn't just device IDs
that were different, but also the names of the device data fields. This meant that I
needed a whole new mapping, which meant creating a new parser class
(FOWH65BAltPacket) and adding it to the adapter.
Creating such a mapping turned out to be straightforward. Raw output from rtl_433 revealed the device data field names, and with help from the WeeWX Customization Guide and by studying the existing classes in the adapter code, I came up with a mapping that worked.
After modifying the code on my Pi to fit my needs, I submitted a pull request to the adapter developer in hopes that the new device can be added to the official code. In the instructions that follow, I use my fork of the WeeWX SDR Adapter. I'll update this if the pull request is merged.
The following procedure is based on the developer instructions for weewx-sdr, modified to use my fork of the project, weewx-sdr-jds. If you aren't using my fork, consult the original instructions.
Procedure 1.3. To install the weewx-sdr-jds adapter supporting a Fineoffset-WH65B sensor cluster
-
Download the zipped package from Github.
pi@poley:~ $wget -O weewx-sdr-jds.zip https://github.com/jdormansteele/weewx-sdr-jds/archive/master.zip -
Install the adapter.
pi@poley:~ $sudo wee_extension --install weewx-sdr-jds.zip -
Edit the WeeWX configuration file, /etc/weewx/weewx.conf in three places.
-
In the [Station] section, change the value of station_type to SDR:
# station_type = Simulator station_type = SDR -
Comment out the entire [Simulator] section.
-
Add the following [SDR] section:
##############################################################################

[SDR]

    # This section is for the software-defined radio driver.

    # The time (in seconds) between LOOP packets.
    loop_interval = 2.5

    # Direct testing command:
    # PYTHONPATH=/usr/share/weewx python /usr/share/weewx/user/sdr.py --cmd="rtl_433 -M utc -F json -f 914980000 -s 250000"
    # Command probably needs a -p frequency offset parameter.

    # The driver to use
    driver = user.sdr
    path = /usr/share/weewx/user/
    # ld_library_path = /usr/local/include
    cmd = rtl_433 -M utc -F json -R 78 -f 914980000 -s 250000
    [[sensor_map]]
        outTemp = temperature.16.FOWH65BAltPacket
        outHumidity = humidity.16.FOWH65BAltPacket
        windDir = wind_dir.16.FOWH65BAltPacket
        windSpeed = wind_speed.16.FOWH65BAltPacket
        windGust = wind_gust.16.FOWH65BAltPacket
        rain_total = rain_total.16.FOWH65BAltPacket
        UV = uv_index.16.FOWH65BAltPacket
        # uv = uv.16.FOWH65BAltPacket # Not displaying in web page
        # light = light.16.FOWH65BAltPacket # Not displaying in web page
        outTempBatteryStatus = battery.16.FOWH65BAltPacket
    [[deltas]]
        rain = rain_total

##############################################################################
Now save /etc/weewx/weewx.conf.
-
-
From the
/etc/weewxdirectory, run the following command to test the software toolchain directly. You should see WeeWX output at the command line.pi@poley:/etc/weewx $PYTHONPATH=/usr/share/weewx python /usr/share/weewx/user/sdr.py --cmd="rtl_433 -M utc -F json -f 914980000 -s 250000"out:[u'{"time" : "2020-05-24 02:04:59", "model" : "Fineoffset-WH65B", "id" : 16, "battery_ok" : 1, "temperature_C" : 16.100, "humidity" : 47, "wind_dir_deg" : 277, "wind_avg_m_s" : 0.765, "wind_max_m_s" : 1.020, "rain_mm" : 127.000, "uv" : 218, "uvi" : 0, "light_lux" : 16104.000, "mic" : "CRC"}\n'] parsed: {'battery.16.FOWH65BAltPacket': 1, 'humidity.16.FOWH65BAltPacket': 47.0, 'wind_gust.16.FOWH65BAltPacket': 1.02, 'light.16.FOWH65BAltPacket': 16104.0, 'uv_index.16.FOWH65BAltPacket': 0.0, 'wind_speed.16.FOWH65BAltPacket': 0.765, 'rain_total.16.FOWH65BAltPacket': 127.0, 'usUnits': 17, 'uv.16.FOWH65BAltPacket': 218.0, 'dateTime': 1590285899, 'temperature.16.FOWH65BAltPacket': 16.1, 'wind_dir.16.FOWH65BAltPacket': 277.0} out:[u'{"time" : "2020-05-24 02:05:15", "model" : "Fineoffset-WH65B", "id" : 16, "battery_ok" : 1, "temperature_C" : 16.200, "humidity" : 47, "wind_dir_deg" : 272, "wind_avg_m_s" : 0.765, "wind_max_m_s" : 1.020, "rain_mm" : 127.000, "uv" : 222, "uvi" : 0, "light_lux" : 16151.000, "mic" : "CRC"}\n'] parsed: {'battery.16.FOWH65BAltPacket': 1, 'humidity.16.FOWH65BAltPacket': 47.0, 'wind_gust.16.FOWH65BAltPacket': 1.02, 'light.16.FOWH65BAltPacket': 16151.0, 'uv_index.16.FOWH65BAltPacket': 0.0, 'wind_speed.16.FOWH65BAltPacket': 0.765, 'rain_total.16.FOWH65BAltPacket': 127.0, 'usUnits': 17, 'uv.16.FOWH65BAltPacket': 222.0, 'dateTime': 1590285915, 'temperature.16.FOWH65BAltPacket': 16.2, 'wind_dir.16.FOWH65BAltPacket': 272.0}... -
Start the WeeWX daemon.
pi@poley:~ $sudo /etc/init.d/weewx start
If everything is working, you should start seeing output like this in
/var/log/syslog:
May 23 17:26:00 poley weewx[6959]: sdr: MainThread: lines=[]
May 23 17:26:03 poley weewx[6959]: sdr: MainThread: lines=[]
May 23 17:26:06 poley weewx[6959]: sdr: MainThread: lines=[u'{"time" : "2020-05-24 00:26:03", "model" : "Fineoffset-WH65B", "id" : 16, "battery_ok" : 1, "temperature_C" : 17.600, "humidity" : 46, "wind_dir_deg" : 290, "wind_avg_m_s" : 1.466, "wind_max_m_s" : 1.530, "rain_mm" : 127.000, "uv" : 1586, "uvi" : 4, "light_lux" : 57489.000, "mic" : "CRC"}\n']
May 23 17:26:06 poley weewx[6959]: sdr: MainThread: packet={'outTempBatteryStatus': 1, 'outHumidity': 46.0, 'UV': 4.0, 'dateTime': 1590279963, 'windDir': 290.0, 'outTemp': 17.6, 'windSpeed': 1.466, 'windGust': 1.53, 'rain_total': 127.0, 'usUnits': 17}
May 23 17:26:09 poley weewx[6959]: sdr: MainThread: lines=[]
May 23 17:26:12 poley weewx[6959]: sdr: MainThread: lines=[]
After 10 minutes, you should see weather data being reported at your Pi's Web address. The WeeWX default URL is http://[IP address]/weewx/.
To summarize, here is a reference to all of the files involved in running the SDR dongle with WeeWX. Note that this is the outcome of my decisions to either load packages from apt repositories or to clone them to Git and load them from there manually or from an install script. In particular, I didn't like the file locations resulting from an Git installation of WeeWX, so I used apt.
Table 1.1. SDR+WeeWX files
| Component | Location |
|---|---|
|
WeeWX executable |
/usr/bin/weewxd |
|
WeeWX configuration file |
/etc/weewx/weewx.conf |
|
WeeWX skins and templates |
/etc/weewx/skins |
|
SQLite database |
/var/lib/weewx/ |
|
Generated web pages and images |
/var/www/html/weewx/ |
| WeeWX documentation |
/usr/share/doc/weewx/ |
|
WeeWX examples |
/usr/share/doc/weewx/examples/ |
|
WeeWX utilities |
/usr/bin/wee_* |
|
weewx-sdr |
/usr/share/weewx/user/sdr.py |
|
rtl_433 |
/usr/local/bin/rtl_433 /usr/local/share/man/man1/rtl_433.1 /usr/local/include/rtl_433.h /usr/local/include/rtl_433_devices.h /usr/local/etc/rtl_433/* [Misc. device configurations] |
|
WeeWX init script |
/etc/init.d/weewx |
Since had I planned to capture data from the radio signal alone, the lack of a barometer in the sensor array was a problem. I solved this by purchasing a $5 BMP180 sensor board (just 37¢ from AliExpress but I was in a hurry), originally manufactured by Bosch. This can be connected directly to the Pi's motherboard (via pins that you have to solder on, which come with it), and it offers an adventure in harvesting data from two separate sources and source types. The BMP180 measures barometric pressure, temperature, and altitude. I only cared about the pressure.[6]
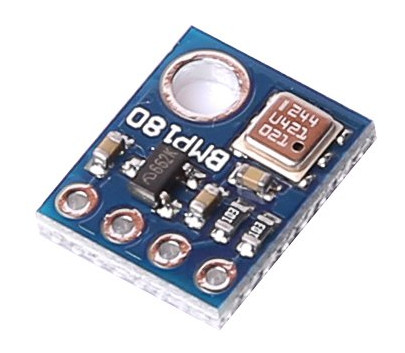
The number of pins for the BMP180 varies. Mine has four:
-
VIN 3.3V — power supply. A commenter on Amazon claimed that 5V power gets regulated down to 3.3V, but I have no intention of testing this.
-
GND — Ground
-
SCL — I2C serial bus clock input
-
SDA — I2C serial bus data
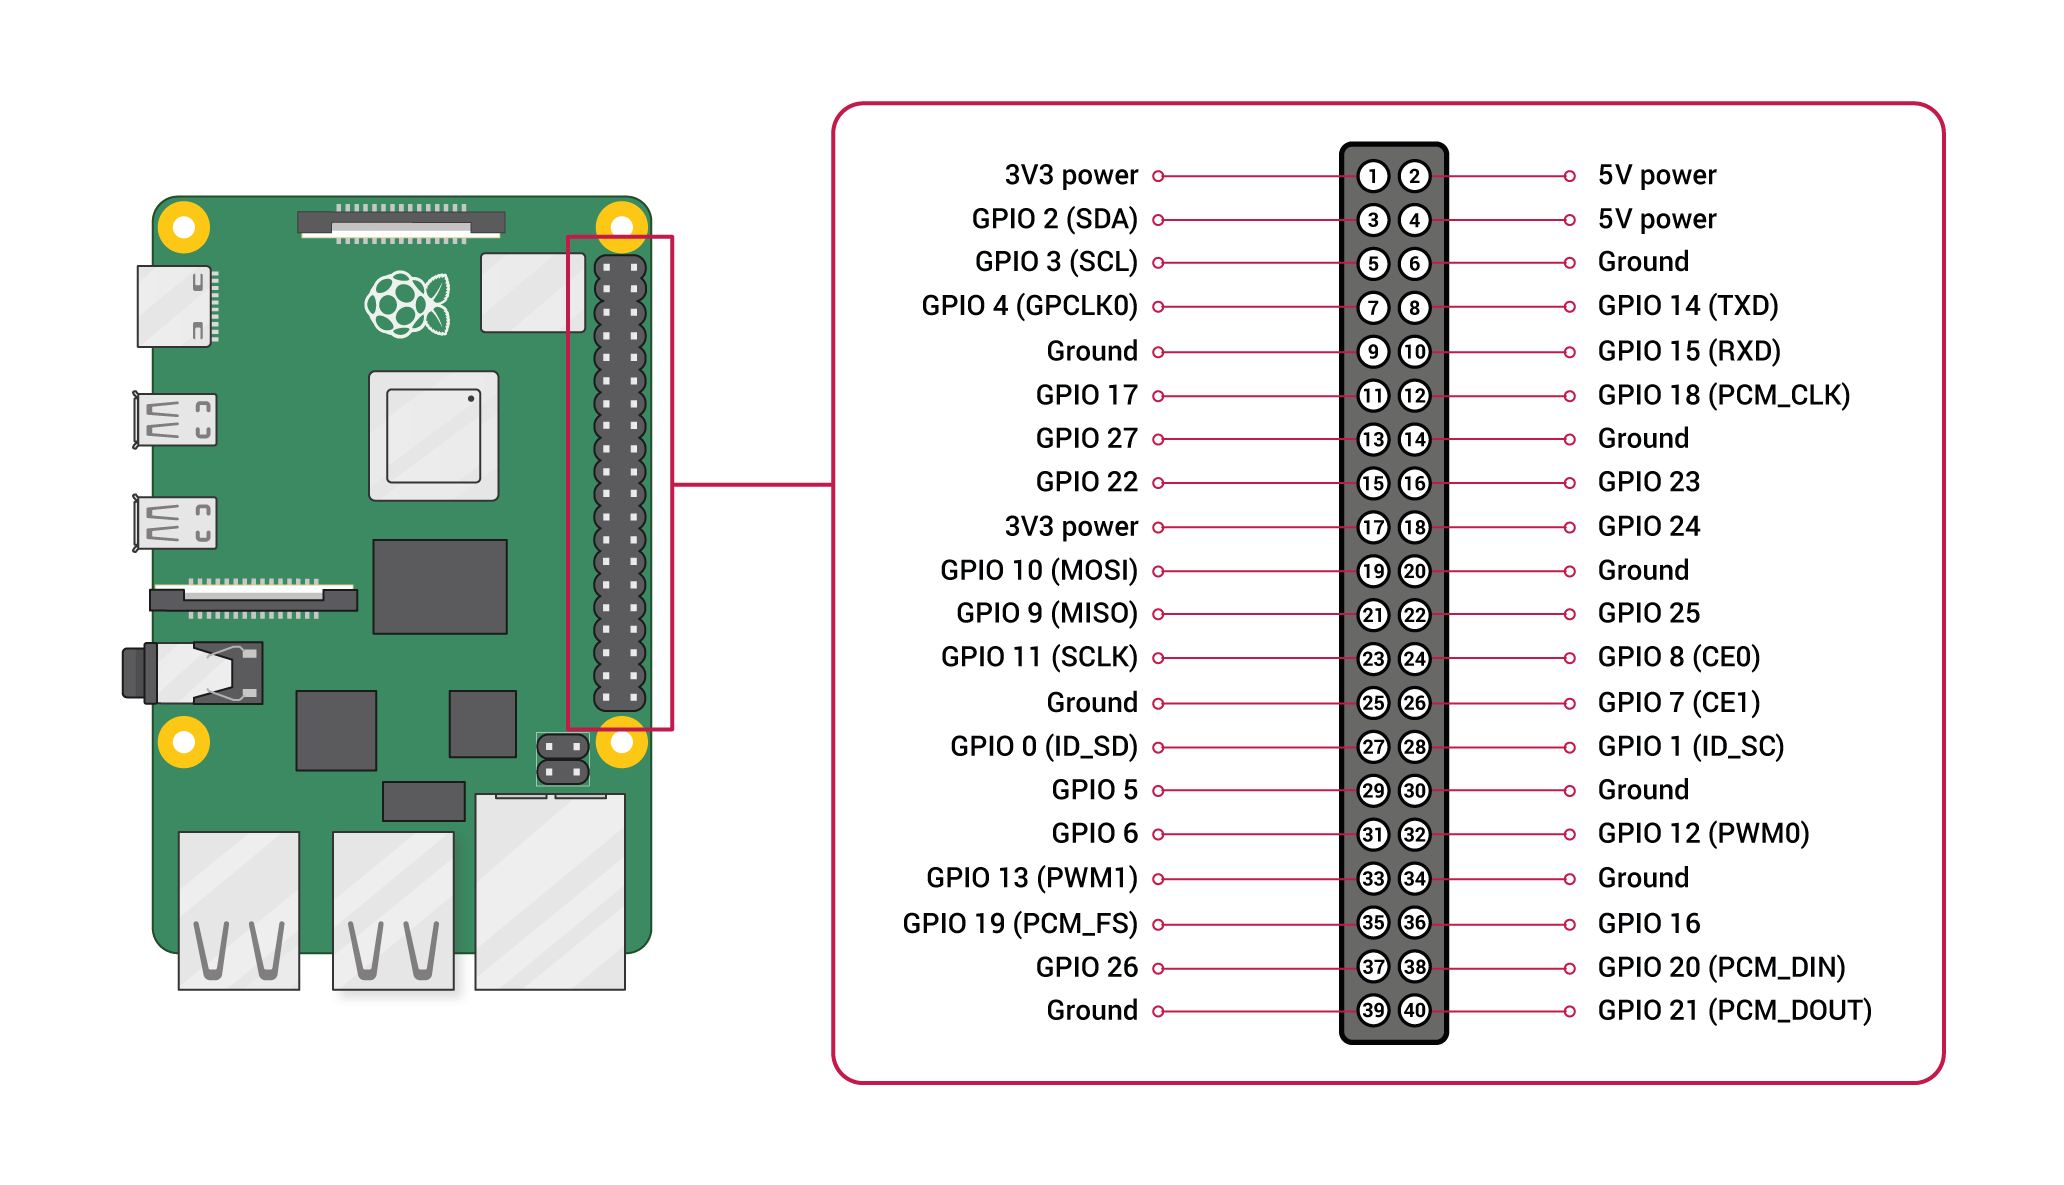
We will be connecting the BMP180 board to the Pi using its general-purpose input-output (GPIO) header, a two-row array of 40 pins. First, though, Raspbian must be configured to recognize the GPIO interface.[7]
Procedure 1.4. To enable the GPIO interface
-
In a terminal, run sudo raspi-config.
-
Select Interface Options: Configure connections to peripherals.
-
Select I2C: Enable/Disable automatic loading of I2C kernel module.
-
Select Finish.
-
Run sudo reboot.
After rebooting, lsmod should find one or more i2c modules:
pi@poley:~ $lsmod | grep i2ci2c_bcm2835 16384 0 i2c_dev 20480 0
The pin array of the Pi's GPIO header matches a standard IDE cable. IDE cables such as the one in my kit are keyed both on the plugs at each end and with a red stripe on one side of the ribbon to identify the wire for Pin #1. This is so that you don't connect them backwards. Unfortunately, the Pi's header is not keyed. As a result, it's necessary to use the following diagram showing the location of Pin #1 on the GPIO header. It's also handy to know that Pin #1 corresponds to the sensor's VIN pin, Pin #3 to SDA, Pin #5 to SCL, and that either Pin #6 or #9 will match GND.[8]
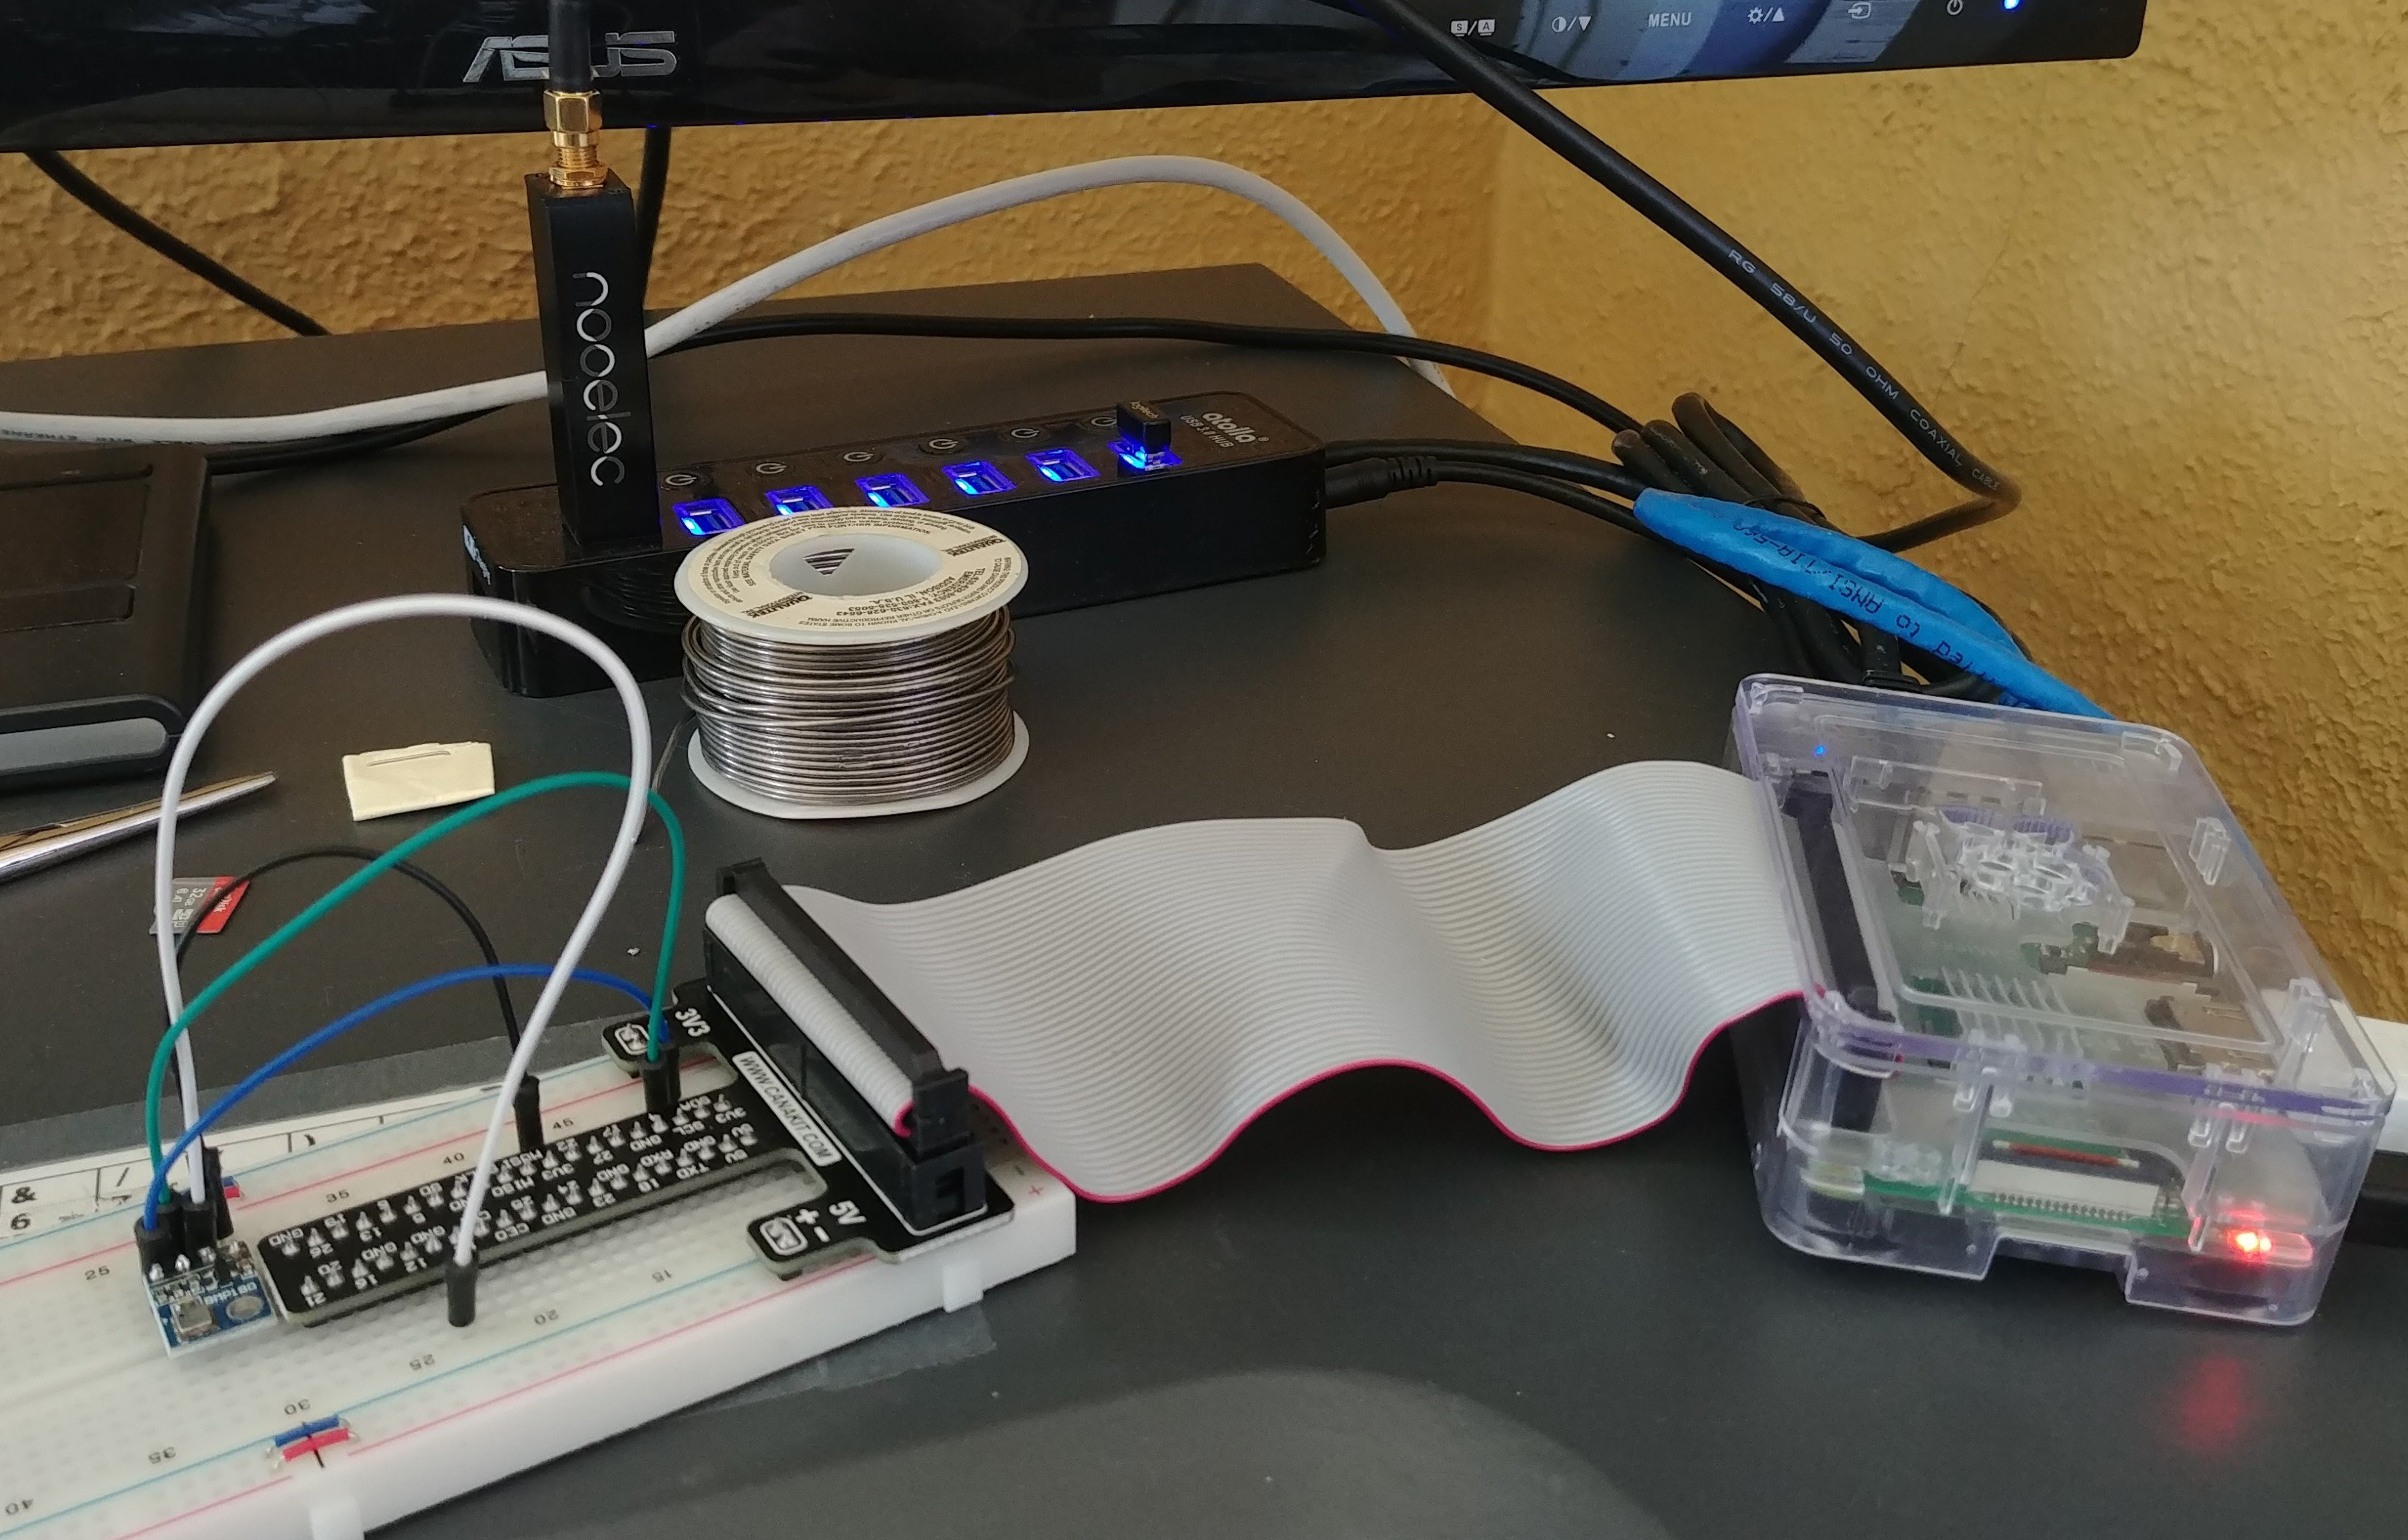
I connected one end of the IDE ribbon cable to the Pi, the other end to the GPIO-to-interface IO board, which I then plugged into the breadboard. I also plugged the BMP180 board into the breadboard, and used jumper wires to complete the connection to the Pi. It ended like this, with the BMP180 visible at lower left.
At this point, you can test if the interface works and the BMP180 sensor is detected. In a terminal, run i2cdetect as shown:
pi@poley:~ $sudo i2cdetect -y 10 1 2 3 4 5 6 7 8 9 a b c d e f 00: -- -- -- -- -- -- -- -- -- -- -- -- -- 10: -- -- -- -- -- -- -- -- -- -- -- -- -- -- -- -- 20: -- -- -- -- -- -- -- -- -- -- -- -- -- -- -- -- 30: -- -- -- -- -- -- -- -- -- -- -- -- -- -- -- -- 40: -- -- -- -- -- -- -- -- -- -- -- -- -- -- -- -- 50: -- -- -- -- -- -- -- -- -- -- -- -- -- -- -- -- 60: -- -- -- -- -- -- -- -- -- -- -- -- -- -- -- -- 70: -- -- -- -- -- -- -- 77
The output shows that the interface works and that the sensor is detected as device 0x77.
Adafruit Industries is the source for Raspberry Pi libraries that support devices like the BMP180. The library I used has been deprecated because this sensor has been around for a while, and other libraries have been written for more advanced sensors. However, there is nothing wrong with the BMP180 if all you want is pressure, and the price is right. This is also the device best supported in WeeWX. You can ignore the deprecation notices.[9]
Installation of the Adafruit BMP180 library also pulls in two dependencies, Adafruit GPIO and Adafruit PureIO. The GPIO already works without these, but the BMP180 won't.
Procedure 1.5. To install the libraries
Clone the package from Github.
pi@poley:~/git $git clone https://github.com/adafruit/Adafruit_Python_BMP.git-
In the Adafruit_Python_BMP directory, run the installation script.[10]
pi@poley:~/git/Adafruit_Python_BMP $sudo python setup.py installrunning install running bdist_egg running egg_info ... -
Run the test utility located in the Adafruit_Python_BMP/examples directory.
pi@poley:~/git/Adafruit_Python_BMP/examples $sudo python simpletest.pyTemp = 23.20 *C Pressure = 101722.00 Pa Altitude = -33.50 m Sealevel Pressure = 101732.00 Pa
Next we need to collect the BMP180 output and pass it to the WeeWX engine. The WeeWX Extra Sensors Adapter does this. This adapter actually supports two sensors, the BMP180 and a temperature/humidity sensor called the DHT22. The instructions say it "requires" the DHT22, but that's not true; what it requires (by default) is the DHT22 library from Adafruit. More on this below.[11]
Procedure 1.6. To install the extra sensors adapter
Clone the package from Github.
pi@poley:~/git $git clone https://github.com/eyesnz/weewx_pi_sensors.gitCopy the adapter file
extra_sensors_service.pyto the WeeWX adapters directory.pi@poley:~/git $sudo cp weewx_pi_sensors/weewx_service/extra_sensors_service.py /usr/share/weewx/user/-
Edit the WeeWX configuration file, /etc/weewx/weewx.conf, to recognize the new sensor service. You do this by adding the following line to the [Engine] section:
data_services = user.extra_sensors_service.ExtraSensorsService,
I commented out the existing empty data_services line as well, so that it ended up looking like this:
# This section configures the internal weewx engine. [Engine] [[Services]] # This section specifies the services that should be run. They are # grouped by type, and the order of services within each group # determines the order in which the services will be run. prep_services = weewx.engine.StdTimeSynch# data_services = , data_services = user.extra_sensors_service.ExtraSensorsService,process_services = weewx.engine.StdConvert, weewx.engine.StdCalibrate, weewx.engine.StdQC, weewx.wxservices.StdWXCalculate archive_services = weewx.engine.StdArchive restful_services = weewx.restx.StdStationRegistry, weewx.restx.StdWunderground, weewx.restx.StdPWSweather, weewx.restx.StdCWOP, weewx.restx.StdCWOP, weewx.restx.StdWOW, weewx.restx.StdAWEKAS report_services = weewx.engine.StdPrint, weewx.engine.StdReport ... -
Restart WeeWX.
pi@poley:~ $sudo /etc/init.d/weewx restartI always do this with another terminal open watching
/var/log/syslog, and whoops, look what happened – the WeeWx adaptor wants that DHT library:pi@poley:~ $sudo tail -f /var/log/syslog... May 08 09:43:14 poley weewx[2319]: **** File "/usr/share/weewx/user/extra_sensors_service.py", line 5, in <module> May 08 09:43:14 poley weewx[2319]: **** import Adafruit_DHT as dht May 08 09:43:14 poley weewx[2319]: **** ImportError: No module named Adafruit_DHT ... -
Rather than hacking the driver just now, let's install the other library:[12]
pi@poley:~/git $git clone https://github.com/adafruit/Adafruit_Python_DHT.gitNavigate to the
Adafruit_Python_DHTdirectory and run the installation script:pi@poley:~/git/Adafruit_Python_DHT $sudo python setup.py installrunning install running bdist_egg ...Restart WeeWX:
pi@poley:~/git/Adafruit_Python_DHT $sudo /etc/init.d/weewx restartCheck the log:
pi@poley:~ $sudo tail -f /var/log/syslog ...May 8 10:19:04 poley weewx[2803]: sdr: MainThread: packet={'outTempBatteryStatus': 1, 'outHumidity': 45.0, 'UV': 7.0, 'dateTime': 1588958171, 'windDir': 351.0, 'outTemp': 20.4, 'windSpeed': 0.829, 'windGust': 1.02, 'rain_total': 88.9, 'usUnits': 17} May 8 10:19:04 poley weewx[2803]: extrasensors: found pressure value of 1017.11 mbar...If you see the sensor data being logged, it means the data is now being written to the database and will be included in each HTML report.
(Optional) However, the DHT code isn't actually doing anything, because there is no DHT sensor feeding data to it. It's just a stated requirement in the extra_sensors_service.py adapter. Consequently, I went a step further and commented out all references to the DHT module in extra_sensors_service.py. My modified adapter code looks like this:
import syslog import weewx from weewx.wxengine import StdService import Adafruit_BMP.BMP085 as BMP085
# import Adafruit_DHT as dhtclass ExtraSensorsService(StdService): def __init__(self, engine, config_dict): super(ExtraSensorsService, self).__init__(engine, config_dict) d = config_dict.get('ExtraSensorsService', {}) # Read from config which pin to use on the RPI GPIO # Defaults to 22# self.dht22_pin = d.get('dht22_pin', 22)# Use the loop packet event as that allows data to still get into the WeeWX database # as well as supporting a OLED module on the RPI self.bind(weewx.NEW_LOOP_PACKET, self.load_data) def load_data(self, event): try: self.get_bmp180(event)# self.get_dht22(event)except Exception, e: syslog.syslog(syslog.LOG_ERR, "extrasensors: cannot read value: %s" % e) # Get BMP180 data def get_bmp180(self, event): sensor = BMP085.BMP085() pressure = float(sensor.read_pressure()/100.0) syslog.syslog(syslog.LOG_DEBUG, "extrasensors: found pressure value of %s mbar" % pressure) # NOTE: stores as mbar event.packet['pressure'] = float(pressure)# Get DHT22 data # def get_dht22(self, event): # humidity, temperature = dht.read_retry(dht.DHT22, self.dht22_pin) # if humidity is not None: # syslog.syslog(syslog.LOG_DEBUG, "extrasensors: found humidity value of %s %%" % humidity) # event.packet['inHumidity'] = float(humidity) # if temperature is not None: # syslog.syslog(syslog.LOG_DEBUG, "extrasensors: found temperature value of %s C" % temperature) # NOTE: stores as celsius # event.packet['inTemp'] = float(temperature)Replace the original
/usr/share/weewx/user/extra_sensors_service.pywith this modified version and restart WeeWX again. Looking at the log, you should see that the WeeWX loop is running fine without calling the DHT library. And you can just delete the local Adafruit_Python_DHT repository.
To summarize once again, here are files added or changed to support the BMP180 sensor.
Table 1.2. Support files for BMP180
| Component | Location |
|---|---|
| Adafruit Python BMP Library | /usr/local/lib/python2.7/dist-packages/Adafruit_BMP-1.5.4-py2.7.egg |
| Adafruit GPIO Library | /usr/local/lib/python2.7/dist-packages/Adafruit_GPIO-1.0.4-py2.7.egg |
| Adafruit PureIO Library | /usr/local/lib/python2.7/dist-packages/Adafruit_PureIO-1.1.5-py2.7.egg |
| Adafruit Python DHT Library | /usr/local/lib/python2.7/dist-packages/Adafruit_DHT-1.4.0-py2.7-linux-armv7l.egg |
| WeeWX Extra Sensors Adapter | /usr/share/weewx/user/extra_sensors_service.py |
| WeeWX configuration file | /etc/weewx/weewx.conf |
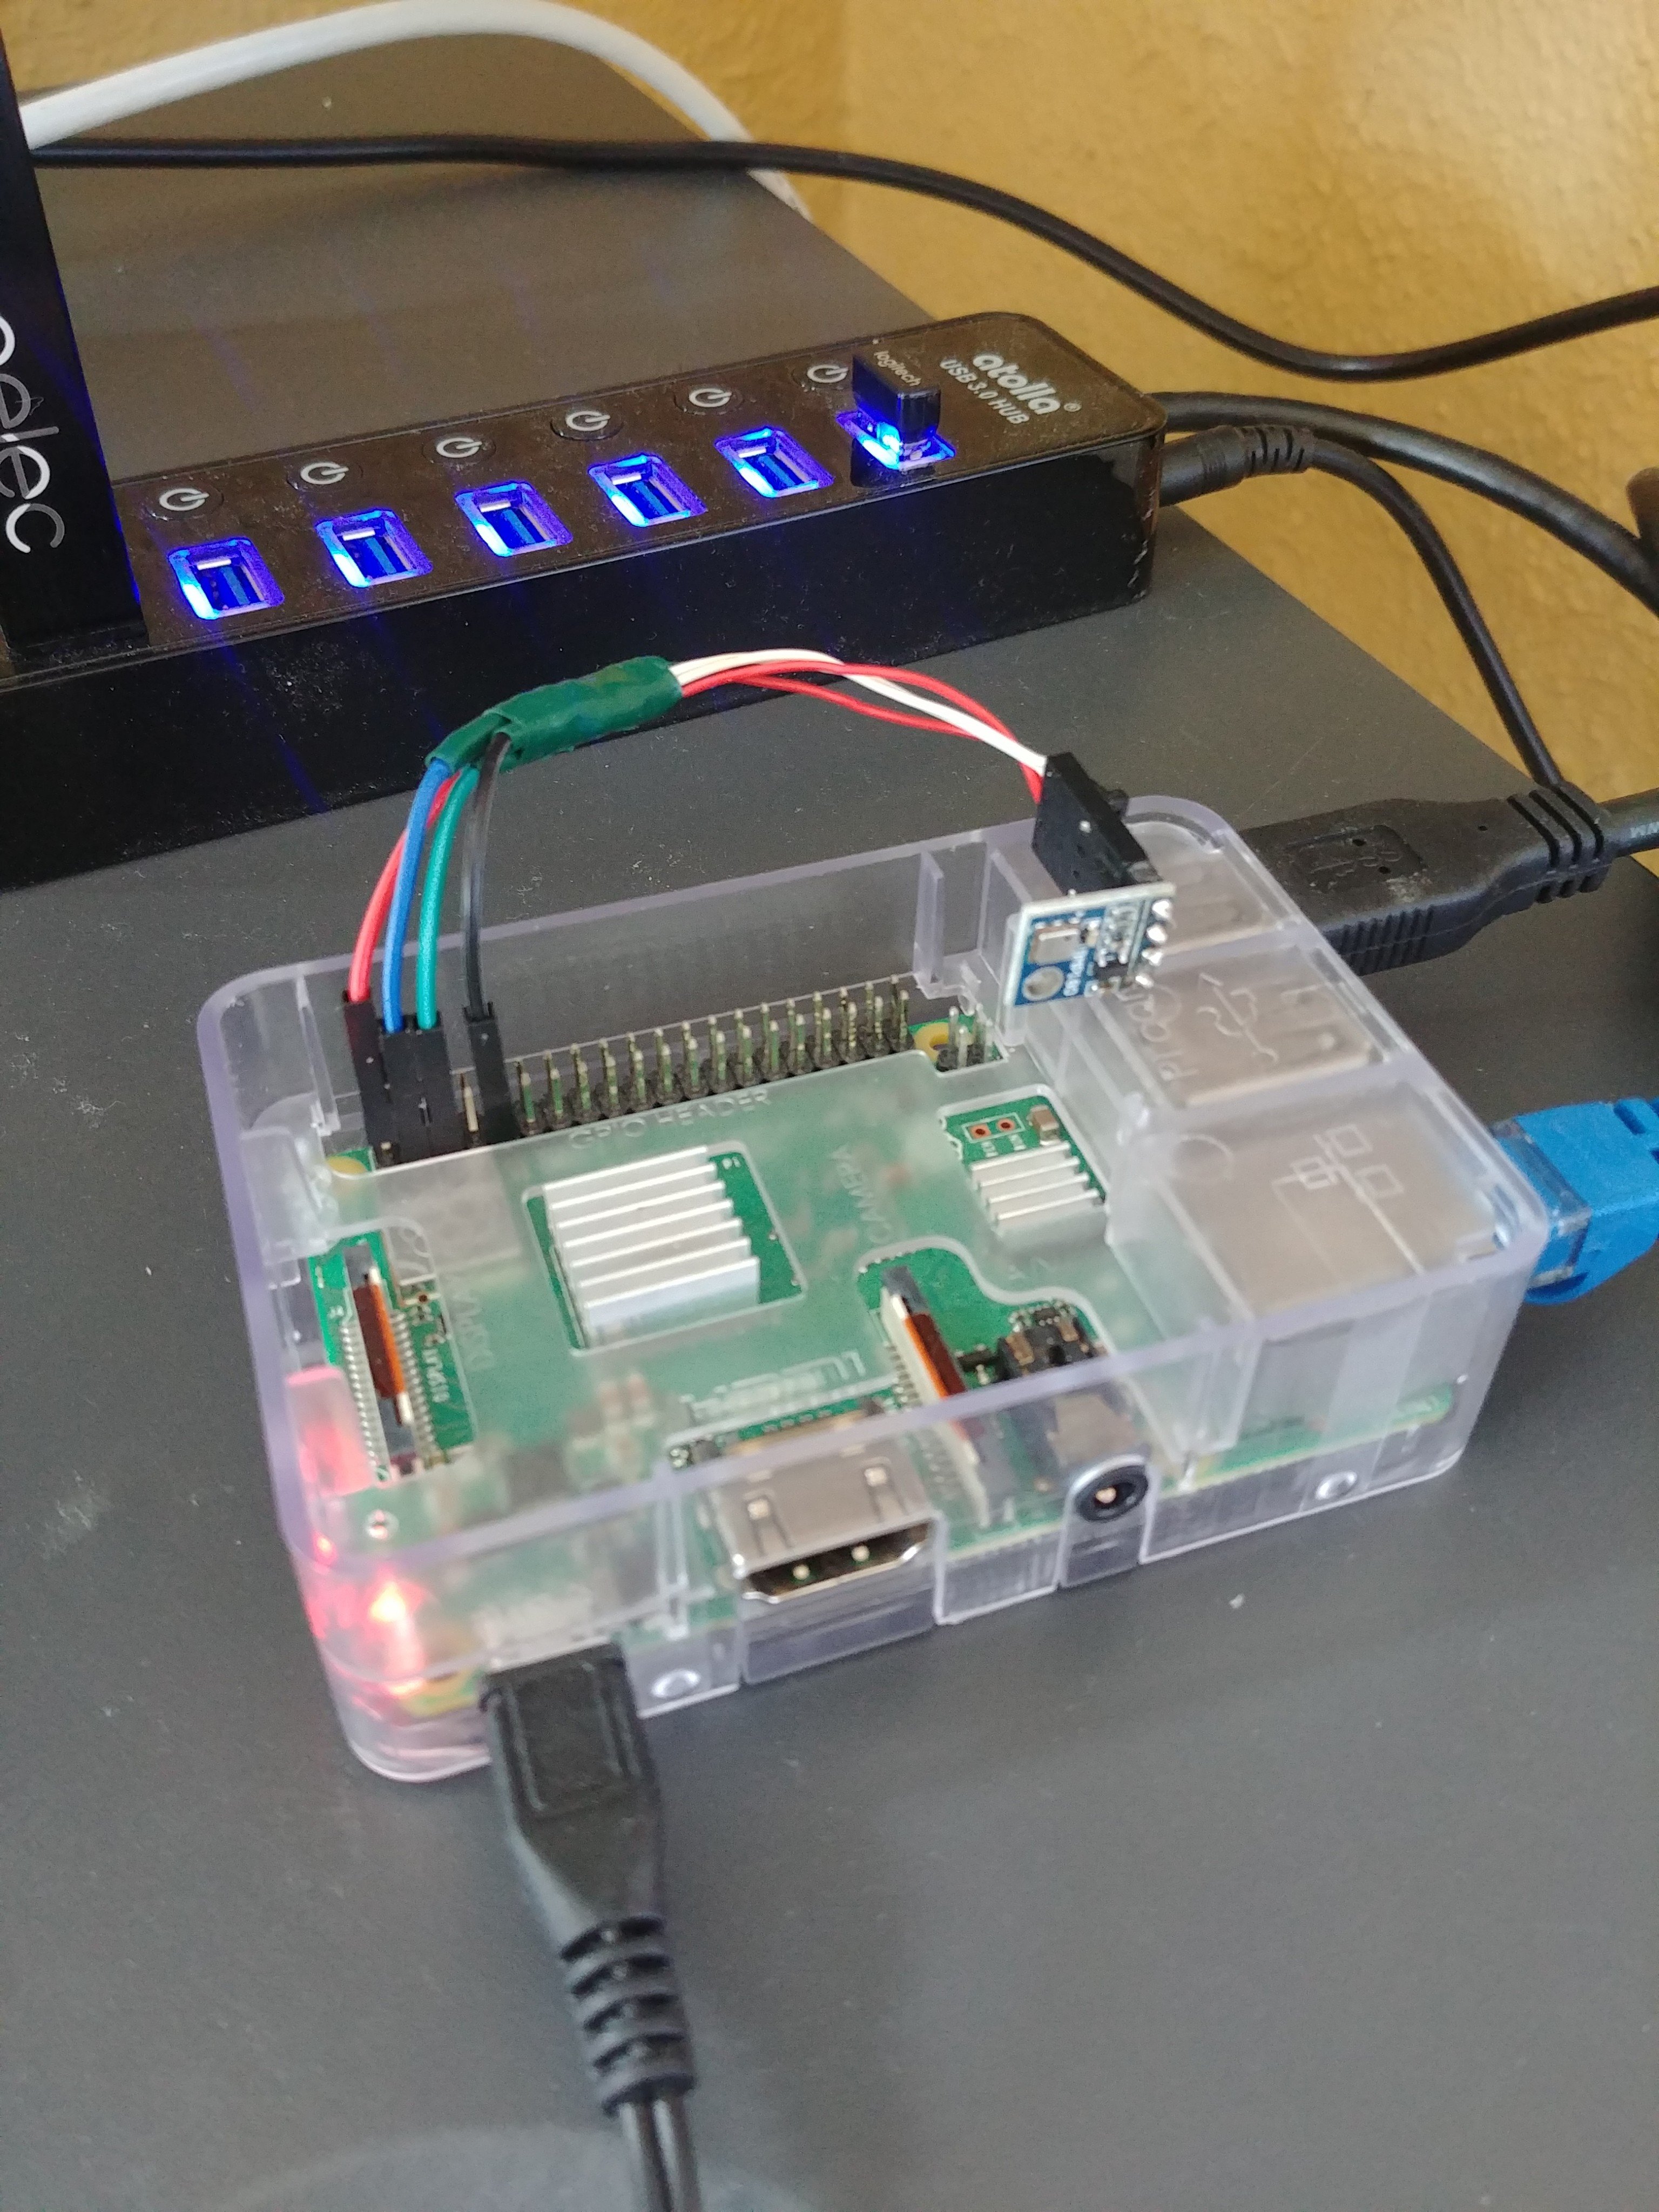
Once the prototype hardware assembly was confirmed to be working, I made a wiring harness from an old CDROM audio cable. Its four-pin connector perfectly matched the pins on the sensor, and I cannibalized the pins on one end to fill out the empty pin slots on the other end. The pins attaching to the GPIO came from the Pi kit. Now the BMP180 could be installed more compactly, as shown:
[1] Purchased from Amazon: https://www.amazon.com/gp/product/B01GDN1T4S/.
[5] Developer documentation is at https://github.com/merbanan/rtl_433. I consulted tutorials at https://www.sensorsiot.org/install-rtl_433-for-a-sdr-rtl-dongle-on-a-raspberry-pi/ and https://sdr-setup-notes.readthedocs.io/en/latest/dev_rtlsdr.html#rtl-433-tool-setup.
[6] Product as purchased: https://www.amazon.com/dp/B00UUS12PO. Data sheet from Bosch: https://pdf1.alldatasheet.com/datasheet-pdf/view/1132068/BOSCH/BMP180.html.
[7] I followed the Adafruit GPIO tutorial at https://learn.adafruit.com/adafruits-raspberry-pi-lesson-4-gpio-setup/configuring-i2c.
[8] From https://www.seeedstudio.com/blog/2020/02/19/how-to-use-raspberry-pi-gpio-pins-python-tutorial/.
[9] The complete Adafruit tutorial for using this library is available at https://learn.adafruit.com/using-the-bmp085-with-raspberry-pi/using-the-adafruit-bmp-python-library.
[10] While rebuilding this system, I couldn't get all of this Adafruit package to build. I think the software is starting to get pretty old and creaky. Fortunately, I had preserved copies of the binaries from the original installation, and I simply dropped a built egg file in place: /usr/local/lib/python2.7/dist-packages/Adafruit_PureIO-1.1.5-py2.7.egg. When I get around to it. I'll look into a more respectable fix. One useful resource may be the Adafruit libraries demonstrated in https://tutorials-raspberrypi.com/raspberry-pi-and-i2c-air-pressure-sensor-bmp180/. This gets the sensor working and suggests how to integrate this functionality in another program.
[11] See the developer's instruction at https://github.com/eyesnz/weewx_pi_sensors.
[12] Developer instructions available at https://github.com/adafruit/Adafruit_Python_DHT.